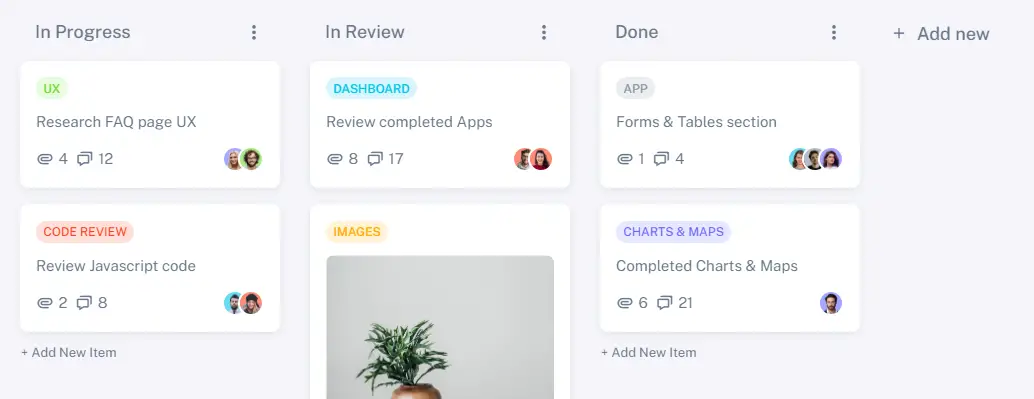
Kanban boards are powerful tools for visualizing and managing tasks or projects in a structured way. Laravel, a popular PHP framework, offers great support for building dynamic web applications, making it an excellent choice for implementing a drag-and-drop Kanban board. In this tutorial, we'll walk you through creating a Laravel-based Kanban board with drag-and-drop functionality. By the end of this tutorial, you'll have a fully functional Kanban board that you can use for project management or task tracking.
Prerequisites: Before we dive into building our Laravel Kanban board, you should have the following prerequisites in place:
- A basic understanding of PHP and Laravel.
- Composer installed on your development machine.
- Laravel installed on your system.
- A web server (e.g., Apache or Nginx) set up and running.
- Basic knowledge of JavaScript and Vue.js.
- A code editor (e.g., VSCode, PhpStorm) for writing and editing code.

Step 1: Set Up a New Laravel Project
Begin by creating a new Laravel project or using an existing one if you prefer. Open your terminal and run the following command:
composer create-project --prefer-dist laravel/laravel kanban-board
This command will create a new Laravel project named "kanban-board" in your current directory.
Step 2: Database Configuration
Next, configure your database connection by editing the .env file. Update the following lines with your database credentials:
.env
DB_CONNECTION=mysql
DB_HOST=127.0.0.1
DB_PORT=3306
DB_DATABASE=your_database_name
DB_USERNAME=your_database_username
DB_PASSWORD=your_database_password
Step 3: Create Route
Now in this example, I will create a route to make our laravel drag and dropable jquery laravel application. So create this below route
routes\web.php
<?php

use Illuminate\Support\Facades\Route;
use App\Http\Controllers\ItemController;

Route::get('/', [ItemController::class,'itemView']);
Route::get('/update-items', [ItemController::class,'updateItems'])->name('update.items');
Step 4: Create Migration
In this step, I will create an Item table and model. So run the below command to create it.
php artisan make:model Item -m
After running this above command open your newly created migrated file and paste those below field in this items table.
<?php

public function up()
{
   Schema::create('items', function (Blueprint $table) {
       $table->id();
       $table->string('title');
       $table->integer('order');
       $table->tinyInteger('status');
       $table->timestamps();
   });
}
Step 5: Create Controller
In this step, we need to create our ItemController to create our two methods so that we can make laravel drag and drop system with a sortable option.
App\Http\Controllers\ItemController.php
<?php

namespace App\Http\Controllers;

use App\Models\Item;
use Illuminate\Http\Request;

class ItemController extends Controller
{
    public function itemView()
    {
    	$panddingItem = Item::where('status',0)
		                    ->orderBy('order')
							->get();

    	$completeItem = Item::where('status',1)
		                    ->orderBy('order')
							->get();
    	return view('test',compact('panddingItem','completeItem'));
    }
    public function updateItems(Request $request)
    {
    	$input = $request->all();

		if(!empty($input['pending'])){
			foreach ($input['pending'] as $key => $value) {
				$key = $key + 1;
				Item::where('id',$value)
						->update([
							'status'=> 0,
							'order'=>$key
						]);
			}
		}

		if(!empty($input['accept'])){
			foreach ($input['accept'] as $key => $value) {
				$key = $key + 1;
				Item::where('id',$value)
						->update([
							'status'=> 1,
							'order'=>$key
						]);
			}
		}
    	return response()->json(['status'=>'success']);
    }
}
Step 6: Create View
Now we are in the final step and all are almost set to go. To create a view and paste those below code to see our jQuery drag and dropable data.
resources\views\test.blade.php
<!doctype html>
<html lang="en">
<head>
  <meta charset="utf-8">
  <meta name="viewport" content="width=device-width, initial-scale=1">
  <meta name="csrf-token" content="{{ csrf_token() }}">
  <title>jQuery UI Draggable</title>
  <link rel="stylesheet" href="https://stackpath.bootstrapcdn.com/bootstrap/4.4.1/css/bootstrap.min.css" integrity="sha384-Vkoo8x4CGsO3+Hhxv8T/Q5PaXtkKtu6ug5TOeNV6gBiFeWPGFN9MuhOf23Q9Ifjh" crossorigin="anonymous">
  <link rel="stylesheet" href="//code.jquery.com/ui/1.12.1/themes/base/jquery-ui.css">
  <style>
    #draggable {width: 150px;height: 150px;padding: 0.5em;}
  </style>
</head>
<body class="bg-light">
<div class="container">
  <div class="row">
    <div class="col-md-12">
        <h2 class="text-center pb-3 pt-1">Learning drag and dropable</h2>
        <div class="row">
            <div class="col-md-5 p-3 bg-dark offset-md-1">
                <ul class="list-group shadow-lg connectedSortable" id="padding-item-drop">
                  @if(!empty($panddingItem) && $panddingItem->count())
                    @foreach($panddingItem as $key => $value)
                      <li class="list-group-item" item-id="{{ $value->id }}">{{ $value->title }}</li>
                    @endforeach
                  @endif
                </ul>
            </div>
            <div class="col-md-5 p-3 bg-dark offset-md-1 shadow-lg complete-item">
                <ul class="list-group  connectedSortable" id="complete-item-drop">
                  @if(!empty($completeItem) && $completeItem->count())
                    @foreach($completeItem as $key => $value)
                      <li class="list-group-item " item-id="{{ $value->id }}">{{ $value->title }}</li>
                    @endforeach
                  @endif
                </ul>
            </div>
        </div>
    </div>
  </div>
</div>
  <script src="https://code.jquery.com/jquery-3.4.1.js"></script>
  <script src="https://stackpath.bootstrapcdn.com/bootstrap/4.4.1/js/bootstrap.min.js" integrity="sha384-wfSDF2E50Y2D1uUdj0O3uMBJnjuUD4Ih7YwaYd1iqfktj0Uod8GCExl3Og8ifwB6" crossorigin="anonymous"></script>
  <script src="https://code.jquery.com/ui/1.12.1/jquery-ui.js"></script>
  <script>
  $( function() {
    $( "#padding-item-drop, #complete-item-drop" ).sortable({
      connectWith: ".connectedSortable",
      opacity: 0.5,
    });
    $( ".connectedSortable" ).on( "sortupdate", function( event, ui ) {
        var pending = [];
        var accept = [];
        $("#padding-item-drop li").each(function( index ) {
          if($(this).attr('item-id')){
            pending[index] = $(this).attr('item-id');
          }
        });
        $("#complete-item-drop li").each(function( index ) {
          accept[index] = $(this).attr('item-id');
        });
        $.ajax({
            url: "{{ route('update.items') }}",
            method: 'POST',
            headers: {
                'X-CSRF-TOKEN': $('meta[name="csrf-token"]').attr('content')
            },
            data: {pending:pending,accept:accept},
            success: function(data) {
              console.log('success');
            }
        });
    });
  });
</script>
</body>
</html>
Open your browser and navigate to http://localhost:8000 (or the appropriate URL) to test your Laravel Kanban board with drag-and-drop functionality.
Conclusion
In this tutorial, you've learned how to create a Laravel-based Kanban board with drag-and-drop functionality. This interactive board can be a valuable tool for managing tasks or projects efficiently. You can further customize and expand this project to meet your specific requirements, such as user authentication, task assignment, or notifications. Happy coding
