
Unlike Stripe or other payment gateways, PayPal works in a completely different process. PayPal completes payment from their website URL and then gives us a redirect URL so that we can redirect the user to our website page after successful payment. If there is any payment error occurs, PayPal also gives us an error redirection URL where we can show the error message to the end user.
In this tutorial, I will show you how to integrate the PayPal payment gateway in Laravel 10 application using srmklive/paypal the package. Previously, if you don't know how the PayPal payment gateway works, then this laravel paypal integration example definitely help you.
To create this Laravel 10 PayPal integration, we need a sandbox account and PayPal client id, and client secret. Let's see the example tutorial of paypal integration in laravel 10.

Step 1: Install Laravel 10
First of all, we need to get a fresh Laravel 10 version application using the bellow command, So open your terminal OR command prompt and run the bellow command to start how to integrate paypal payment gateway in laravel 10.
composer create-project laravel/laravel example-app
Step 2: Install Package
Before using PayPalClient, we need to install srmklive/paypal package. Let's run the below command to install it.
composer require srmklive/paypal:~3.0
Step 3: Create PayPal Account
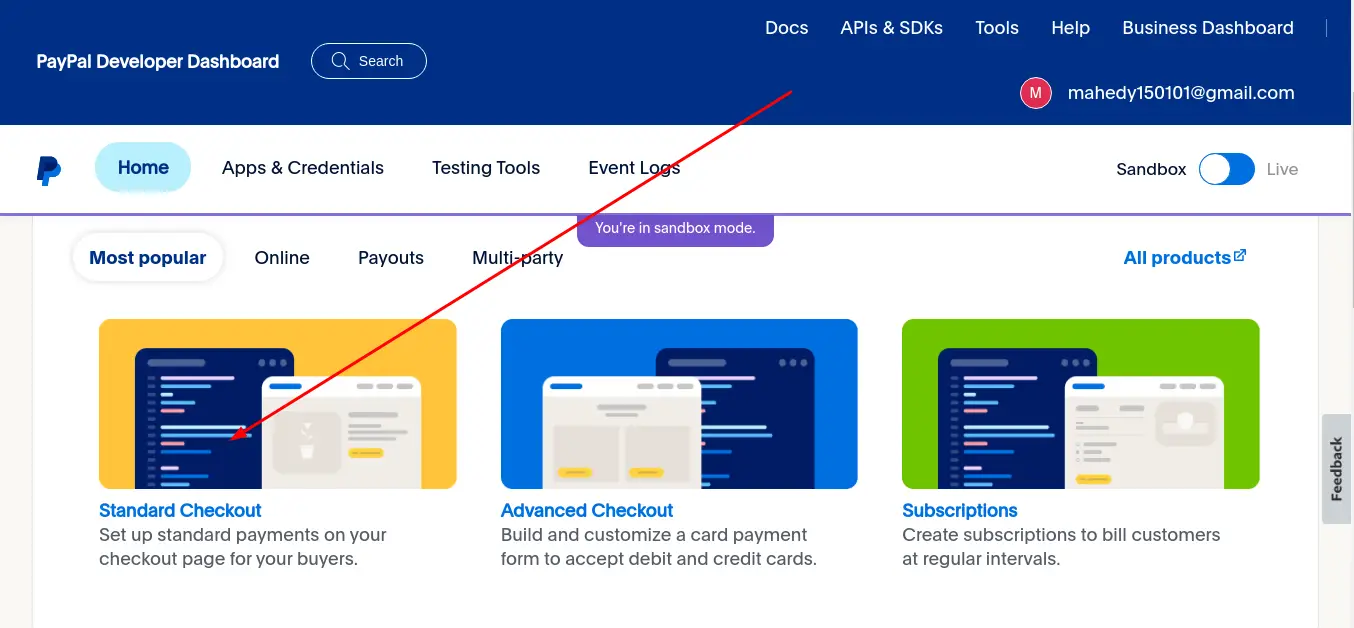
Now we have to create a PayPal sandbox account. So create a PayPal sandbox account and put the client secret and client token in your.env file like that. Click the standard checkout in the first step.
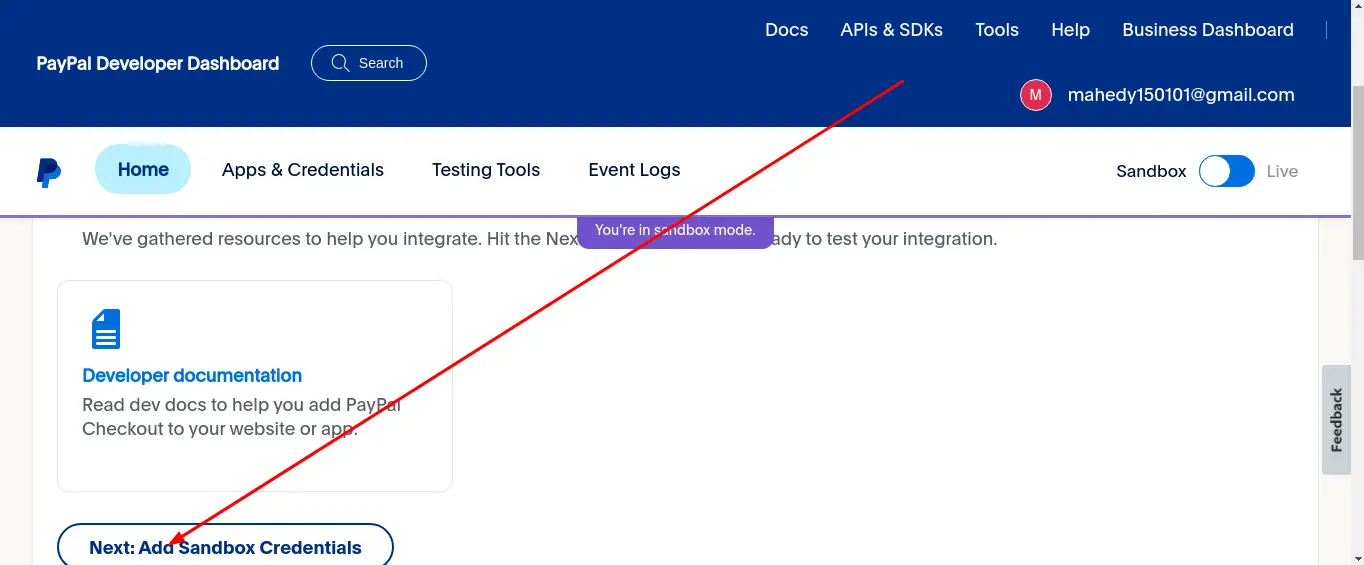
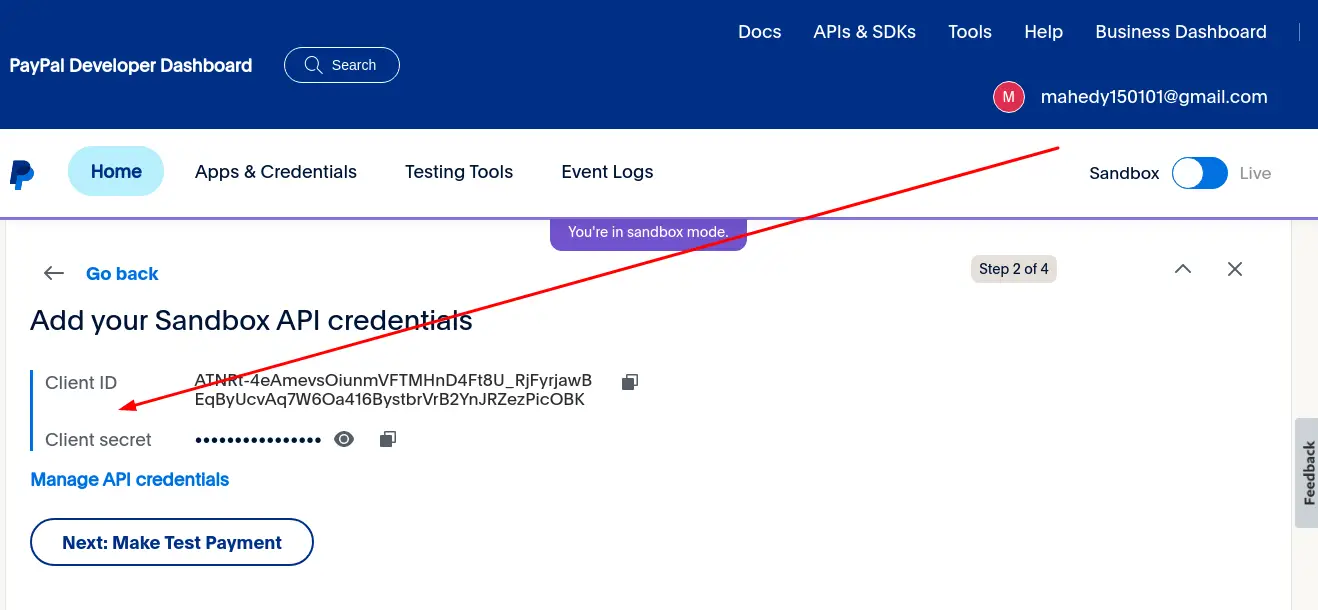
Now click the add sandbox credentials to get credentials:
Now you will get the client id and client secret like:
Now update the .env like that:
.env
PAYPAL_MODE=sandbox
PAYPAL_SANDBOX_CLIENT_ID=
PAYPAL_SANDBOX_CLIENT_SECRET=
Now publish the package config file and update it like below:
php artisan vendor:publish --provider "Srmklive\PayPal\Providers\PayPalServiceProvider"
config/paypal.php
<?php

/**
 * PayPal Setting & API Credentials
 * Created by Raza Mehdi <srmk@outlook.com>.
 */

return [
    'mode'    => env('PAYPAL_MODE', 'sandbox'),
    'sandbox' => [
        'client_id'     => env('PAYPAL_SANDBOX_CLIENT_ID', ''),
        'client_secret' => env('PAYPAL_SANDBOX_CLIENT_SECRET', ''),
        'app_id'        => 'APP-80W284485P519543T',
    ],
    'live' => [
        'client_id'    => env('PAYPAL_SANDBOX_API_USERNAME', ''),
        'client_secret'    => env('PAYPAL_SANDBOX_API_PASSWORD', ''),
        'app_id'      => 'APP-80W284485P519543T',
    ],

    'payment_action' => 'Sale', // Can only be 'Sale', 'Authorization' or 'Order'
    'currency'       => env('PAYPAL_CURRENCY', 'USD'),
    'billing_type'   => 'MerchantInitiatedBilling',
    'notify_url'     => '', // Change this accordingly for your application.
    'locale'         => '', // force gateway language  i.e. it_IT, es_ES, en_US ... (for express checkout only)
    'validate_ssl'   => true, // Validate SSL when creating api client.
];
Step 4: Create Route
Here, we need to add four routes. One is for showing the payment button, the second one is for payment and the third one is for successful payment and the last one is for payment error handling.
routes/web.php
<?php

use Illuminate\Support\Facades\Route;
use App\Http\Controllers\PaymentController;

Route::controller(PaymentController::class)
    ->prefix('paypal')
    ->group(function () {
        Route::view('payment', 'paypal.index')->name('create.payment');
        Route::get('handle-payment', 'handlePayment')->name('make.payment');
        Route::get('cancel-payment', 'paymentCancel')->name('cancel.payment');
        Route::get('payment-success', 'paymentSuccess')->name('success.payment');
    });
Step 5: Create Controller
Here, we need to create the PaymentController and update it like:
app/Http/Controllers/PaypalController.php
<?php

namespace App\Http\Controllers;

use Illuminate\Http\Request;
use Srmklive\PayPal\Services\PayPal as PayPalClient;

class PaymentController extends Controller
{
    public function handlePayment(Request $request)
    {
        $provider = new PayPalClient;
        $provider->setApiCredentials(config('paypal'));
        $paypalToken = $provider->getAccessToken();
        $response = $provider->createOrder([
            "intent" => "CAPTURE",
            "application_context" => [
                "return_url" => route('success.payment'),
                "cancel_url" => route('cancel.payment'),
            ],
            "purchase_units" => [
                0 => [
                    "amount" => [
                        "currency_code" => "USD",
                        "value" => "100.00"
                    ]
                ]
            ]
        ]);
        if (isset($response['id']) && $response['id'] != null) {
            foreach ($response['links'] as $links) {
                if ($links['rel'] == 'approve') {
                    return redirect()->away($links['href']);
                }
            }
            return redirect()
                ->route('cancel.payment')
                ->with('error', 'Something went wrong.');
        } else {
            return redirect()
                ->route('create.payment')
                ->with('error', $response['message'] ?? 'Something went wrong.');
        }
    }

    public function paymentCancel()
    {
        return redirect()
            ->route('create.payment')
            ->with('error', $response['message'] ?? 'You have canceled the transaction.');
    }

    public function paymentSuccess(Request $request)
    {
        $provider = new PayPalClient;
        $provider->setApiCredentials(config('paypal'));
        $provider->getAccessToken();
        $response = $provider->capturePaymentOrder($request['token']);
        if (isset($response['status']) && $response['status'] == 'COMPLETED') {
            return redirect()
                ->route('create.payment')
                ->with('success', 'Transaction complete.');
        } else {
            return redirect()
                ->route('create.payment')
                ->with('error', $response['message'] ?? 'Something went wrong.');
        }
    }
}
Step 6: Create Blade file
In this step, we need to create a payment blade file and update the file. so let's change it.
resources/views/paypal/index.blade.php
@extends('layouts.app')

@section('content')
    <div class="panel panel-default">
        <div class="panel-body">
            <h1 class="text-3xl md:text-5xl font-extrabold text-center uppercase mb-12 bg-gradient-to-r from-indigo-400 via-purple-500 to-indigo-600 bg-clip-text text-transparent transform -rotate-2">Make A Payment</h1>
            @if (session()->has('success'))
                <div class="alert alert-success">
                    {{ session()->get('success') }}
                </div>
            @endif
            <center>
                <a href="{{ route('make.payment') }}" class="w-full bg-indigo-500 uppercase rounded-xl font-extrabold text-white px-6 h-8">Pay with PayPal👉</a>
            </center>
        </div>
    </div>
@endsection
Now you can test our application by visiting the below URL:
URL
Now use this demo card information:
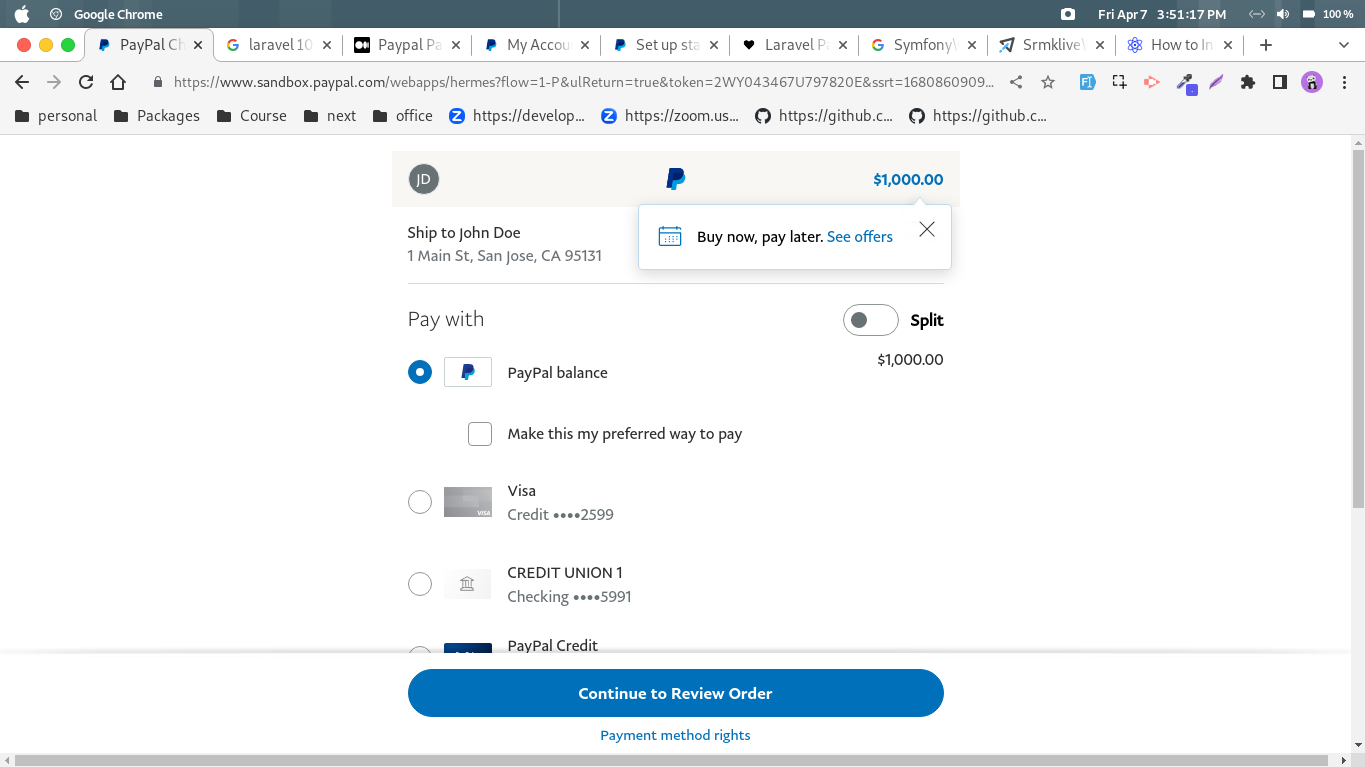
Now if you submit the form, you will see the following output:
And successful redirection to our website:
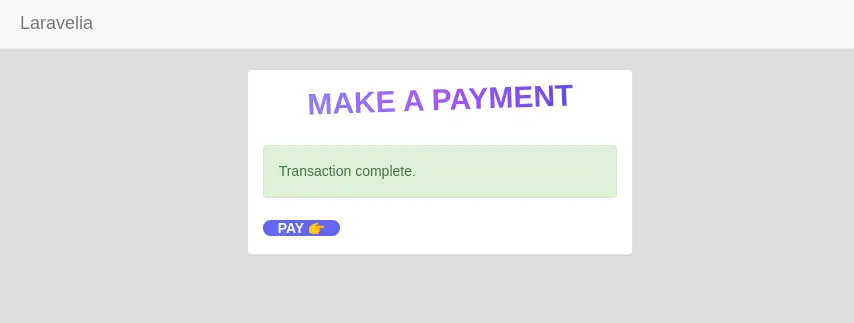
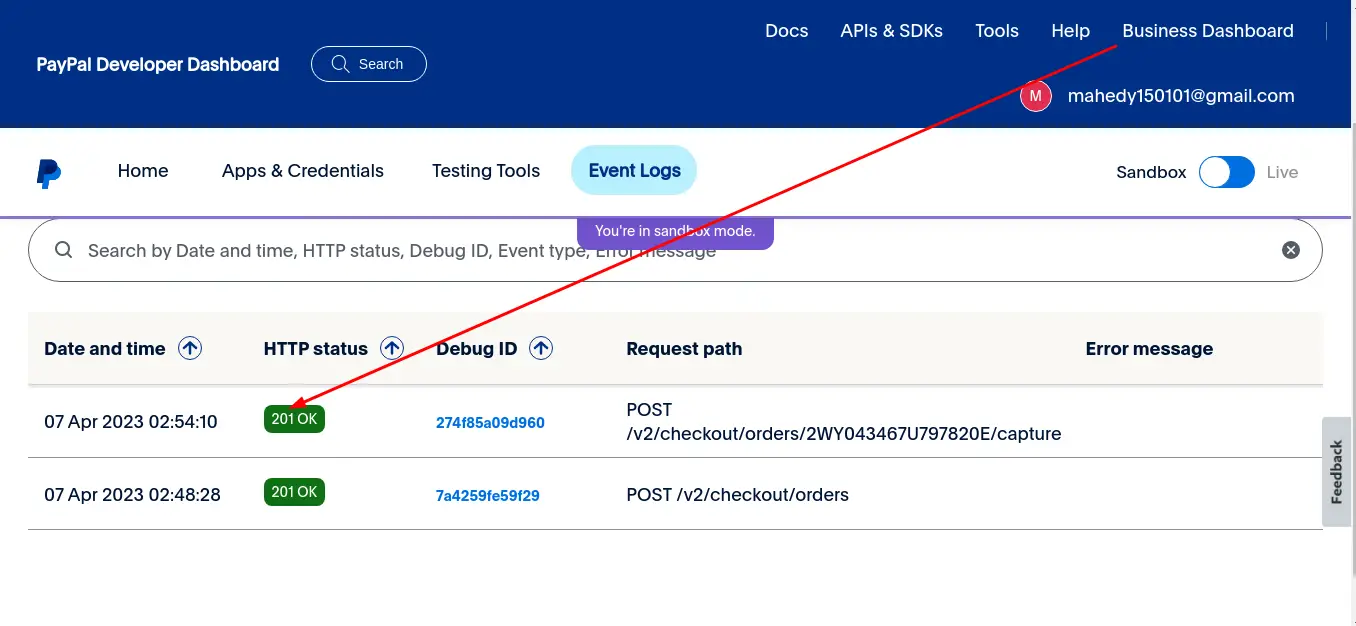
And now see my paypal account with the following charge:
Read also: Laravel 10 Stripe Payment Gateway Integration Tutorial
Conclusion
You know laravel 10 paypal integration. Hope after following this paypal integration in laravel 10 tutorial, you own now able to create this how to integrate paypal payment gateway in laravel 10 application.