Using the stripe/stripe-php composer package, we can create a one time payment system in PHP based application very easily. In this tutorial, we will see how to create a one time payment system in Laravel using stripe with stripe/stripe-php package.
We can charge customers with a stripe payment gateway in two ways. One is using paymentIntents and the other is a create method which is available on the charge class.
I will use paymentIntents to charge a customer with Stripe using Laravel 10 application. So in this tutorial, you will learn how to integrate the stripe payment gateway in the Laravel 10 application. In this laravel stripe tutorial, I will create a payment form and we will store that payment using stripe api.
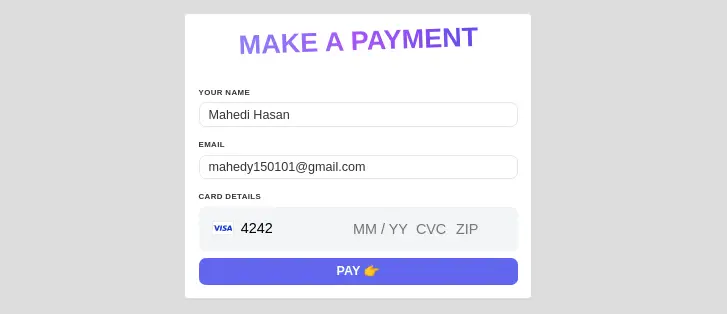
Let's see the demo payment form of stripe payment gateway integration in laravel 10:

Step 1: Install Laravel 10
First of all, we need to get a fresh Laravel 10 version application using the bellow command, So open your terminal OR command prompt and run the bellow command to start laravel 10 stripe tutorial.
composer create-project laravel/laravel example-app
Step 2: Install Package
Before using StripeClient, we need to install php stripe package. Let's run the below command to install it.
composer require stripe/stripe-php
Step 3: Create Stripe Account
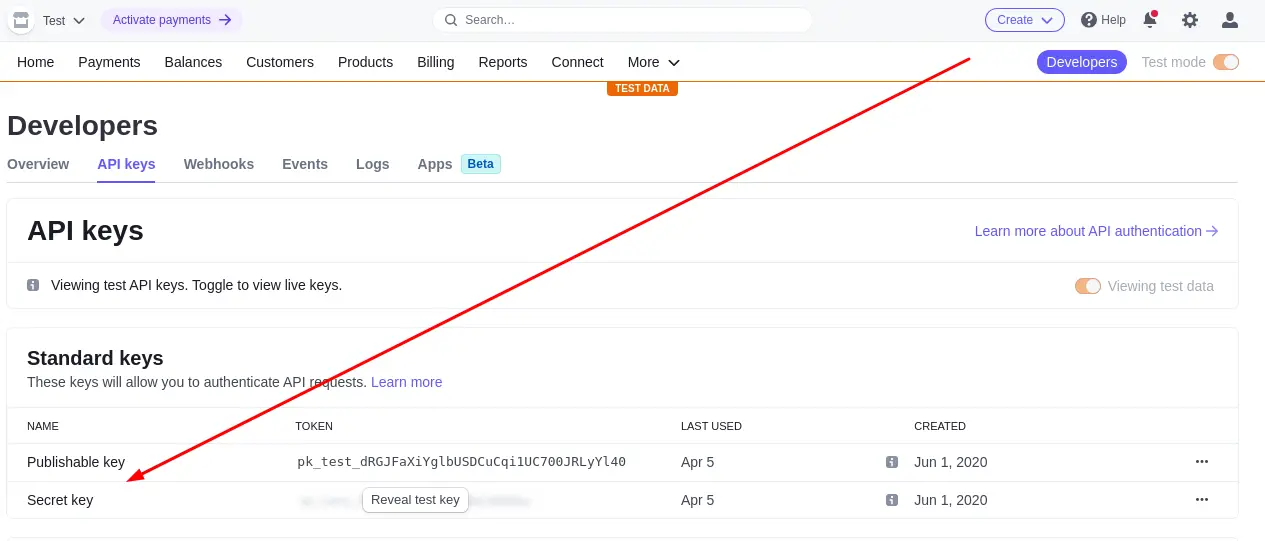
Now we have to create stripe a stripe account. So create a stripe account and put the client secret and client token in your.env file like that:
 Now update the .env like this:
.env
STRIPE_KEY=
STRIPE_SECRET=
Step 4: Create Route
Here, we need to add two routes to display the payment form and another is store the payment with stripe
routes/web.php
<?php

use Illuminate\Support\Facades\Route;
use App\Http\Controllers\LaraveliaController;

Route::name('stripe.')
    ->controller(LaraveliaController::class)
    ->prefix('stripe')
    ->group(function () {
        Route::get('payment', 'index')->name('index');
        Route::post('payment', 'store')->name('store');
    });
Step 5: Create Controller
Here, we need to add the index() method for showing the payment form and another store method for completing the payment.
app/Http/Controllers/LaraveliaController.php
<?php

namespace App\Http\Controllers;

use Exception;
use Stripe\StripeClient;
use Illuminate\Http\Request;
use Stripe\Exception\CardException;

class LaraveliaController extends Controller
{
    public function index()
    {
        return view('stripe.index');
    }

    public function store(Request $request)
    {
        try {
            $stripe = new StripeClient(env('STRIPE_SECRET'));

            $stripe->paymentIntents->create([
                'amount' => 99 * 100,
                'currency' => 'usd',
                'payment_method' => $request->payment_method,
                'description' => 'Demo payment with stripe',
                'confirm' => true,
                'receipt_email' => $request->email
            ]);
        } catch (CardException $th) {
            throw new Exception("There was a problem processing your payment", 1);
        }

        return back()->withSuccess('Payment done.');
    }
}
Step 6: Create Blade file
In this step, we need to create a payment blade file and update the file. so let's change it.
resources/views/stripe/index.blade.php
@extends('layouts.app')

@section('content')
    <div class="panel panel-default">
        <div class="panel-body">
            <h1 class="text-3xl md:text-5xl font-extrabold text-center uppercase mb-12 bg-gradient-to-r from-indigo-400 via-purple-500 to-indigo-600 bg-clip-text text-transparent transform -rotate-2">Make A Payment</h1>
            @if (session()->has('success'))
                <div class="alert alert-success">
                    {{ session()->get('success') }}
                </div>
            @endif
            <form action="{{ route('stripe.store') }}" method="POST" id="card-form">
                @csrf
                <div class="mb-3">
                    <label for="card-name" class="inline-block font-bold mb-2 uppercase text-sm tracking-wider">Your name</label>
                    <input type="text" name="name" id="card-name" class="border-2 border-gray-200 h-11 px-4 rounded-xl w-full">
                </div>
                <div class="mb-3">
                    <label for="email" class="inline-block font-bold mb-2 uppercase text-sm tracking-wider">Email</label>
                    <input type="email" name="email" id="email" class="border-2 border-gray-200 h-11 px-4 rounded-xl w-full">
                </div>
                <div class="mb-3">
                    <label for="card" class="inline-block font-bold mb-2 uppercase text-sm tracking-wider">Card details</label>

                    <div class="bg-gray-100 p-6 rounded-xl">
                        <div id="card"></div>
                    </div>
                </div>
                <button type="submit" class="w-full bg-indigo-500 uppercase rounded-xl font-extrabold text-white px-6 h-12">Pay 👉</button>
            </form>
        </div>
    </div>
@endsection
@push('js')
    <script src="https://js.stripe.com/v3/"></script>
    <script>
        let stripe = Stripe('{{ env("STRIPE_KEY") }}')
        const elements = stripe.elements()
        const cardElement = elements.create('card', {
            style: {
                base: {
                    fontSize: '16px'
                }
            }
        })
        const cardForm = document.getElementById('card-form')
        const cardName = document.getElementById('card-name')
        cardElement.mount('#card')
        cardForm.addEventListener('submit', async (e) => {
            e.preventDefault()
            const { paymentMethod, error } = await stripe.createPaymentMethod({
                type: 'card',
                card: cardElement,
                billing_details: {
                    name: cardName.value
                }
            })
            if (error) {
                console.log(error)
            } else {
                let input = document.createElement('input')
                input.setAttribute('type', 'hidden')
                input.setAttribute('name', 'payment_method')
                input.setAttribute('value', paymentMethod.id)
                cardForm.appendChild(input)
                cardForm.submit()
            }
        })
    </script>
@endpush
Now you can test our application by visiting the below URL:
URL
Now use this demo card information:
CARD: 4242 4242 4242 4242
MM: 01
YY: 24
CVC: 123
ZIP: 12345
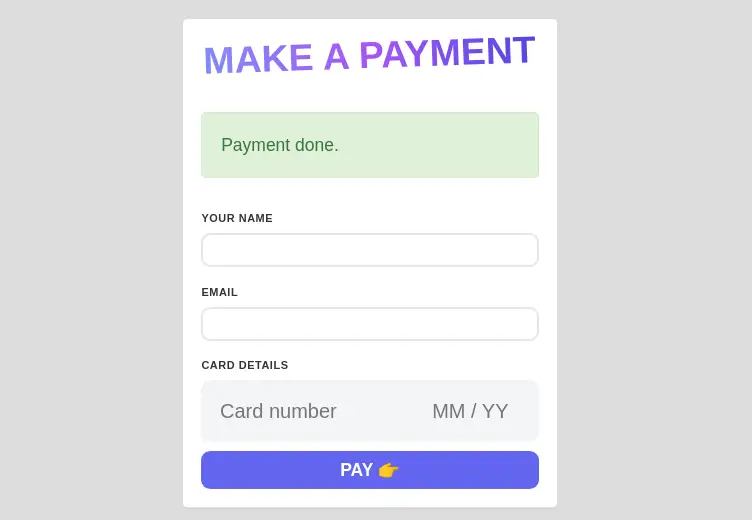
Now if you submit the form, you will see the following output:

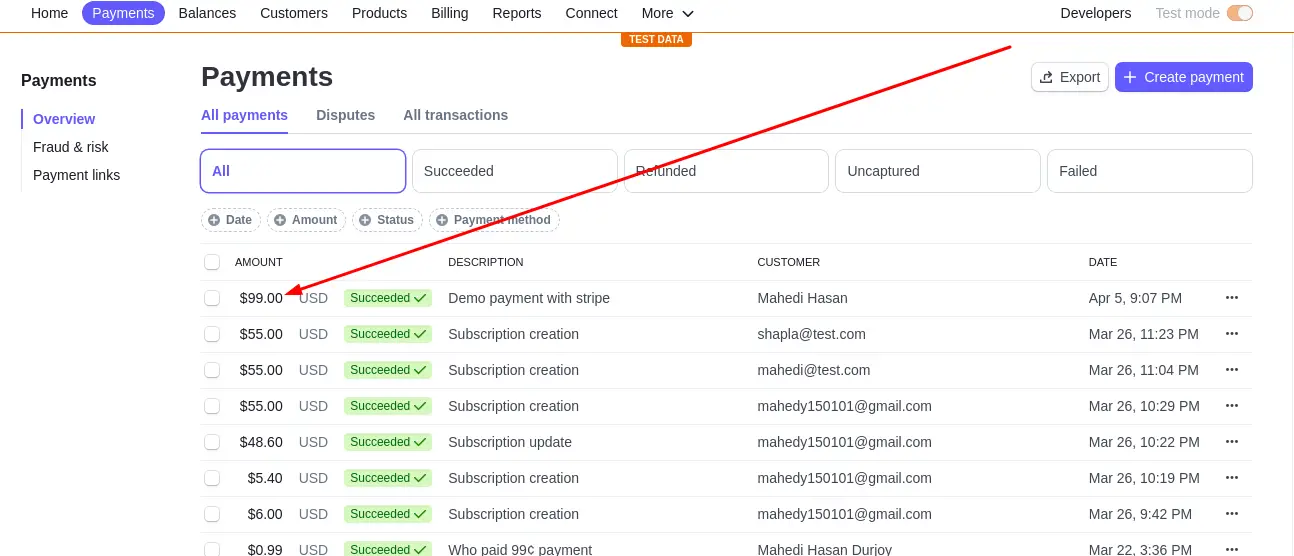
And now see my stripe account with the following charge:

Read also: Laravel 10 Scout Search Multiple Models
Conclusion
You know that i used stripe payment intents to charge. Hope after following this stripe payment gateway integration in laravel 10 tutorial, you own now able to create this laravel stripe payment gateway integration in any php based application.
