
Dropzone.js is one of the most popular JavaScript libraries. It is a great JavaScript library for drag and drop file upload. In this tutorial, I will show you how to upload image using dropzone in laravel and show uploaded image in dropzone laravel.
You know that using dropzone js image upload, we can not create a file type input form in HTML form. For that, we need to create hidden type files in dropzone js and append them in the original HTML form and then we can get the submitted form image as a normal string. In this tutorial, I will create a demo form in Laravel 10 application and I will show you how to upload multiple images with a progress bar using the dropzone js Laravel 10 application. So you will learn laravel upload image with progress bar using dropzone js.
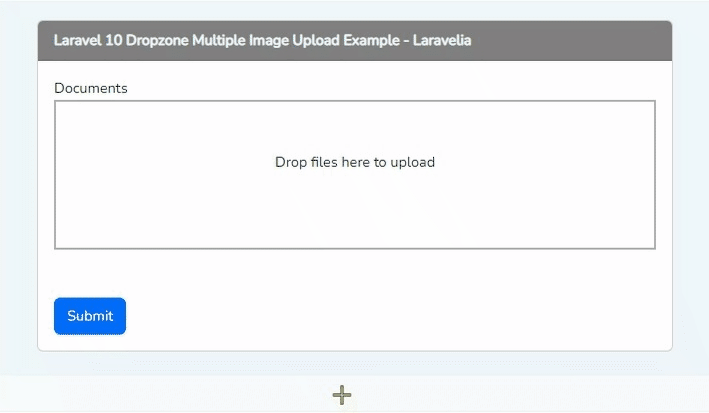
So let's see the preview of multiple image upload with dropzone js in laravel:
Step 1: Download Fresh Laravel
In this first step, we need a fresh Laravel 10 application for the dropzone with other form fields laravel. So download it by the below command:
composer create-project laravel/laravel example-app
Step 2: Create Route
Now in this, create like the below to complete the laravel dropzone multiple files upload. So update it like below:
routes/web.php
<?php

use Illuminate\Support\Facades\Route;
use App\Http\Controllers\TutorialController;

Route::get('/', [TutorialController::class,'index']);
Route::post('/', [TutorialController::class,'store'])->name('store');
Route::post('uploads', [TutorialController::class,'uploads'])->name('uploads');
Step 3: Create Controller
Now in this step, we have to create a TutorialController to define this method to create dropzone laravel 10 image or file upload.
php artisan make:controller TutorialController
Now update the controller like the below:
app/Http/Controllers/TutorialController.php
<?php

namespace App\Http\Controllers;

use Illuminate\Http\Request;

class TutorialController extends Controller
{
    public function index()
    {
        return view('welcome');
    }

    public function store(Request $request)
    {
        foreach($request->input('document', []) as $file) {
            //your file to be uploaded
            return $file;
        }
    }

    public function uploads(Request $request)
    {
        $path = storage_path('tmp/uploads');

        !file_exists($path)) && mkdir($path, 0777, true);

        $file = $request->file('file');
        $name = uniqid() . '_' . trim($file->getClientOriginalName());
        $file->move($path, $name);

        return response()->json([
            'name'          => $name,
            'original_name' => $file->getClientOriginalName(),
        ]);
    }
}
Step 4: Create Views
We are almost there. Just we have to create views files before completing how to upload image using dropzone in laravel. So create these files inside the following path and update them like below:
resources/views/welcome.blade.php
@extends('layouts.app')

@push('style')
<link href="https://cdnjs.cloudflare.com/ajax/libs/dropzone/5.5.1/min/dropzone.min.css" rel="stylesheet" />
@endpush

@section('content')
<div class="container">
    <div class="row justify-content-center">
        <div class="col-md-6">
            <div class="card">
                <div class="card-header" style="background: gray; color:#f1f7fa; font-weight:bold;">
                    Laravel 10 Dropzone Multiple Image Upload Example - Laravelia
                </div>
                 <div class="card-body">
                    <form action="{{ route('store') }}" method="post" enctype="multipart/form-data">
                      @csrf
                        <div class="form-group">
                            <label for="document">Documents</label>
                            <div class="needsclick dropzone" id="document-dropzone">
                        </div>
                        <button type="submit" class="btn btn-primary mt-5">Submit</button>
                    </form>
                </div>
            </div>
        </div>
    </div>
</div>
@endsection
@push('script')
<script src="https://ajax.googleapis.com/ajax/libs/jquery/3.6.3/jquery.min.js"></script>
<script src="https://cdnjs.cloudflare.com/ajax/libs/dropzone/5.5.1/min/dropzone.min.js"></script>
<script>
  var uploadedDocumentMap = {}
  Dropzone.options.documentDropzone = {
    url: "{{ route('uploads') }}",
    maxFilesize: 2, // MB
    addRemoveLinks: true,
    headers: {
      'X-CSRF-TOKEN': "{{ csrf_token() }}"
    },
    success: function (file, response) {
      $('form').append('<input type="hidden" name="document[]" value="' + response.name + '">')
      uploadedDocumentMap[file.name] = response.name
    },
    removedfile: function (file) {
      file.previewElement.remove()
      var name = ''
      if (typeof file.file_name !== 'undefined') {
        name = file.file_name
      } else {
        name = uploadedDocumentMap[file.name]
      }
      $('form').find('input[name="document[]"][value="' + name + '"]').remove()
    },
    init: function () {
      @if(isset($project) && $project->document)
        var files =
          {!! json_encode($project->document) !!}
        for (var i in files) {
          var file = files[i]
          this.options.addedfile.call(this, file)
          file.previewElement.classList.add('dz-complete')
          $('form').append('<input type="hidden" name="document[]" value="' + file.file_name + '">')
        }
      @endif
    }
  }
</script>
@endpush
All are set to go to upload multiple files or images using dropzone js in laravel 10.
Read also: Laravel 10 Image Upload And Display Tutorial
Conclusion
I have tried my best to create this multiple image upload with dropzone js in laravel. Now we know dropzone with other form fields laravel. Hope this dropzone laravel 10 tutorial will help you to create how to upload image using dropzone in laravel.