
Though laravel provides default login and registration, but in this example, we will create how to make registration form in laravel. So from this tutorial, you will see also how to submit form in laravel 9.
In this example, to create this laravel 9 submit form tutorial, I will create a custom registration form and then I will submit it and we will save it into the database. So let's see how to create and submit a form in laravel with registration tutorial.
Step 1: Install Laravel
First of all, we need to get a fresh Laravel 9 version application using the bellow command, So open your terminal OR command prompt and run the bellow command to start laravel registration.
composer create-project laravel/laravel example-app
Read also: Laravel 9 Multi Auth - Create Multiple Authentication In Laravel
Step 2: Connect Database
We need registration, so need database table to save user data. We will open the ".env" file and change the database name, username and password in the env file and create how to submit form in laravel 9.
.env
DB_CONNECTION=mysql
DB_HOST=127.0.0.1
DB_PORT=3306
DB_DATABASE=Enter_Your_Database_Name
DB_USERNAME=Enter_Your_Database_Username
DB_PASSWORD=Enter_Your_Database_Password
Now you have to run this migration by following the command:
php artisan migrate
Step 3: Create Route
Here, we need to add route for register user. so let's add that route in the web.php file.
routes/web.php
<?php

use Illuminate\Support\Facades\Auth;

use App\Http\Controllers\CreateAccountController;

Route::get('account', [CreateAccountController::class, 'index'])->name('account');
Route::post('account', [CreateAccountController::class, 'store']);
Step 4: Create Controller
In this step, we need to create CreateAccountController and add the following code to that file:
app/Http/Controllers/CreateAccountController.php
<?php

namespace App\Http\Controllers;

use App\Models\User;
use Illuminate\Http\Request;
use Illuminate\Support\Facades\Hash;

class CreateAccountController extends Controller
{
    public function index()
    {
        return view('welcome');
    }

    public function store(Request $request)
    {
        $request->validate([
            'name' => ['required', 'string', 'max:255'],
            'email' => ['required', 'string', 'email', 'max:255', 'unique:users'],
            'password' => ['required', 'string', 'min:8', 'confirmed'],
        ]);

        User::create([
            'name' => $request->name,
            'email' => $request->email,
            'password' => Hash::make($request->password),
        ]);

        return redirect()->back()->with('success','Registration completed');
    }
}
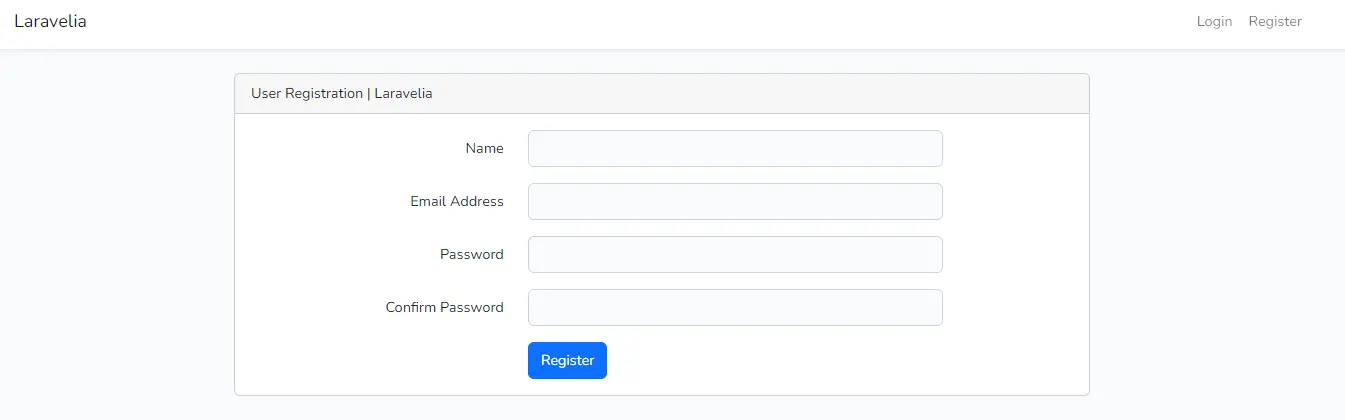
Step 5: Create View
Now in this step, we will create a submit form for register user in laravel. So create it like:
resources/views/welcome.blade.php
<div class="container">
    <div class="row justify-content-center">
        <div class="col-md-8">
            <div class="card">
                <div class="card-header">User Registration | Laravelia</div>
                <form action="{{ route('account') }}" method="post">
                @csrf
                <div class="row mb-3 mt-3">
                    <label for="name" class="col-md-4 col-form-label text-md-end">{{ __('Name') }}</label>

                    <div class="col-md-6">
                        <input id="name" type="text" class="form-control @error('name') is-invalid @enderror" name="name" value="{{ old('name') }}" required autocomplete="name" autofocus>

                        @error('name')
                            <span class="invalid-feedback" role="alert">
                                <strong>{{ $message }}</strong>
                            </span>
                        @enderror
                    </div>
                </div>

                <div class="row mb-3">
                    <label for="email" class="col-md-4 col-form-label text-md-end">{{ __('Email Address') }}</label>

                    <div class="col-md-6">
                        <input id="email" type="email" class="form-control @error('email') is-invalid @enderror" name="email" value="{{ old('email') }}" required autocomplete="email">

                        @error('email')
                            <span class="invalid-feedback" role="alert">
                                <strong>{{ $message }}</strong>
                            </span>
                        @enderror
                    </div>
                </div>

                <div class="row mb-3">
                    <label for="password" class="col-md-4 col-form-label text-md-end">{{ __('Password') }}</label>

                    <div class="col-md-6">
                        <input id="password" type="password" class="form-control @error('password') is-invalid @enderror" name="password" required autocomplete="new-password">

                        @error('password')
                            <span class="invalid-feedback" role="alert">
                                <strong>{{ $message }}</strong>
                            </span>
                        @enderror
                    </div>
                </div>

                <div class="row mb-3">
                    <label for="password-confirm" class="col-md-4 col-form-label text-md-end">{{ __('Confirm Password') }}</label>

                    <div class="col-md-6">
                        <input id="password-confirm" type="password" class="form-control" name="password_confirmation" required autocomplete="new-password">
                    </div>
                </div>

                <div class="row mb-3">
                    <div class="col-md-6 offset-md-4">
                        <button type="submit" class="btn btn-primary">
                            {{ __('Register') }}
                        </button>
                    </div>
                </div>
                </form>
            </div>
        </div>
    </div>
</div>
Now all are set to go to check the registration form in laravel 9. So now you can test your app create registration form in laravel 9. Run the command and start server.
php artisan serve
Now you can test our application by visiting the below URL:
URL
Conclusion
Now we know how to create form in laravel 9. Hope this laravel registration tutorial will help you to create how to make registration form in laravel. You can test now how to create form in laravel 9.