
Laravel provides so many ways of creating auth scaffolding. But sometimes it is not enough. We need more of a custom authentication system in our application. So in this laravel 9 custom login and registration example, we will see how we can create a login and registration system in laravel 9 application.
Laravel provides Auth facades. We can use these 'Auth' facades or we can use the 'auth()' global helper to create this authentication system. Both work the same for login. Next, we will use attempt method. The attempt the method is normally used to handle authentication attempts from your application's "login" form in laravel application by accepting parameters.
Now for registration, we will normally create a user and then we will create a login and registration system in laravel. So in this example, you will learn laravel registration form step by step, and after that laravel custom login and registration. So let's see how to create a custom login and registration page in laravel.
Step 1: Install Laravel
We need a fresh laravel 9 project to complete our tutorial. So download it using the below command.
composer create-project --prefer-dist laravel/laravel blog
Step 2: Add route
After downloading we have to set up our route. To create laravel 9 authentication tutorial, add this route like below:
routes\web.php
<?php

use Illuminate\Support\Facades\Route;
use App\Http\Controllers\Auth\LoginController;

Route::get('/home', [HomeController::class, 'index'])
    ->name('home')
    ->middleware('auth');

Route::namespace('Auth')->group(function () {
    Route::get('login',[LoginController::class,'login'])->name('login');
    Route::post('login',[LoginController::class,'processLogin']);
    Route::get('register',[LoginController::class,'registration'])->name('register');
    Route::post('register',[LoginController::class,'processRegistration']);
});

Route::post('logout',[LoginController::class,'logout'])
    ->name('logout')
    ->middleware('auth');
Step 3: Create LoginController
Now we need a login controller to write our laravel custom login and registration. So create it in this following path. Run the below command to create 'LoginController':
php artisan make:controller Auth/LoginController
And now update it to create laravel login and registration system in laravel 9 application:
App\Http\Controllers\Auth\LoginController.php
<?php

namespace App\Http\Controllers\Auth;

use App\User;
use Illuminate\Http\Request;
use App\Http\Controllers\Controller;
use Illuminate\Support\Facades\Auth;

class LoginController extends Controller
{
    public function __construct()
    {
        $this->middleware('guest')->except('logout');
    }

    public function login()
    {
        return view('login');
    }

    public function processLogin(Request $request)
    {
        $request->validate([
            'email' => 'required',
            'password' => 'required'
        ]);

        $credentials = $request->except(['_token']);

        if (auth()->attempt($credentials)) {
            return redirect()->route('home');
        }

        return redirect()->back()->with('message','Invalid credentials');
    }

    public function registration()
    {
        return view('register');
    }

    public function processRegistration(Request $request)
    {
        $request->validate([
            'name' => 'required',
            'email' => 'required',
            'password' => 'required'
        ]);

        $user = User::create([
            'name' => trim($request->name),
            'email' => strtolower($request->email),
            'password' => bcrypt($request->password)
        ]);

        return redirect()->route('login')->with('message','Your account is created');
    }

    public function logout(Request $request)
    {
          Auth::logout();
         $request->session()->invalidate();
         $request->session()->regenerateToken();

        return redirect()->route('login');
    }
}
Now time to update the 'HomeController' that shows home.blade.php. When a user will be authenticated, we will redirect that user to the 'home' page.
App\Http\Controllers\HomeController.php
<?php

namespace App\Http\Controllers;

use Illuminate\Http\Request;

class HomeController extends Controller
{
    public function __construct()
    {
        $this->middleware(['auth']);
    }

    public function index()
    {
        return view('home');
    }
}
Now update the home page like below:
resources/views/home.blade.php
@extends('layouts.app')

@section('content')
<div class="container">
    <div class="row justify-content-center">
        <div class="col-md-8">
            <div class="card">
                <div class="card-header">Dashboard</div>
                 <div class="card-body">
                   Welcome {{ auth()->user()->name }}, you are logged in!
                </div>
            </div>
        </div>
    </div>
</div>
@endsection
And now update the master file:
resources/views/layouts/app.blade.php
<!doctype html>
<html lang="{{ str_replace('_', '-', app()->getLocale()) }}">
<head>
    <meta charset="utf-8">
    <meta name="viewport" content="width=device-width, initial-scale=1">

    <!-- CSRF Token -->
    <meta name="csrf-token" content="{{ csrf_token() }}">

    <title>{{ config('app.name', 'Laravel') }}</title>

    <!-- Tailwindcss -->
    <script src="https://cdn.tailwindcss.com"></script>

    <!-- Scripts -->
    @vite(['resources/sass/app.scss', 'resources/js/app.js'])
    @stack('style')
</head>
<body>
    <div id="app">
        <nav class="navbar navbar-expand-md navbar-light bg-white shadow-sm">
            <div class="container">
                <a class="navbar-brand" href="{{ url('/') }}">
                    Laravelia
                </a>
                <button class="navbar-toggler" type="button" data-bs-toggle="collapse" data-bs-target="#navbarSupportedContent" aria-controls="navbarSupportedContent" aria-expanded="false" aria-label="{{ __('Toggle navigation') }}">
                    <span class="navbar-toggler-icon"></span>
                </button>

                <div class="collapse navbar-collapse" id="navbarSupportedContent">
                    <!-- Left Side Of Navbar -->
                    <ul class="navbar-nav me-auto">

                    </ul>

                    <!-- Right Side Of Navbar -->
                    <ul class="navbar-nav ms-auto">
                        <!-- Authentication Links -->
                        @guest
                            @if (Route::has('login'))
                                <li class="nav-item">
                                    <a class="nav-link" href="{{ route('login') }}">{{ __('Login') }}</a>
                                </li>
                            @endif

                            @if (Route::has('register'))
                                <li class="nav-item">
                                    <a class="nav-link" href="{{ route('register') }}">{{ __('Register') }}</a>
                                </li>
                            @endif
                        @else
                            <li class="nav-item dropdown">
                                <a id="navbarDropdown" class="nav-link dropdown-toggle" href="#" role="button" data-bs-toggle="dropdown" aria-haspopup="true" aria-expanded="false" v-pre>
                                    {{ Auth::user()->name }}
                                </a>

                                <div class="dropdown-menu dropdown-menu-end" aria-labelledby="navbarDropdown">
                                    <a class="dropdown-item" href="{{ route('logout') }}"
                                       onclick="event.preventDefault();
                                                     document.getElementById('logout-form').submit();">
                                        {{ __('Logout') }}
                                    </a>

                                    <form id="logout-form" action="{{ route('logout') }}" method="POST" class="d-none">
                                        @csrf
                                    </form>
                                </div>
                            </li>
                        @endguest
                    </ul>
                </div>
            </div>
        </nav>

        <main class="py-4" style="background: #f1f7fa;">
            @yield('content')
        </main>
    </div>
    @stack('script')
</body>
</html>
Read also: How To Implement Login With Remember Me In Laravel?
Step 4: Create Blade File
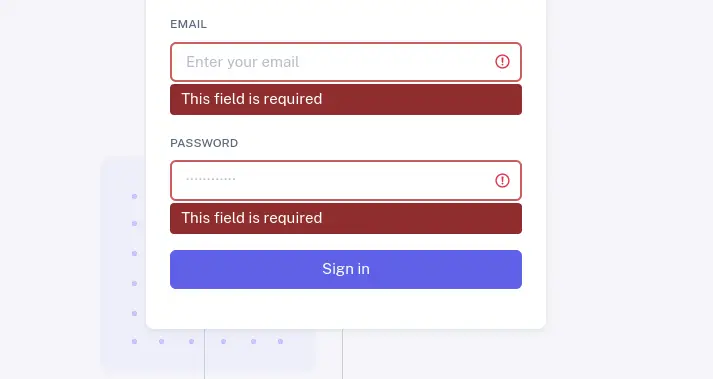
Now in this step, we need to create a blade file for the login and registration form. So create it.
resourses\views\login.blade.php
<form method="post" action="{{ route('login') }}">
    @csrf
  <div class="form-group">
    <label>Email</label>
    <input type="text" name="email" class="form-control p_input">
  </div>
  <div class="form-group">
    <label>Password *</label>
    <input type="password" name="password" class="form-control p_input">
  </div>

  <div class="text-center">
    <button type="submit" class="btn btn-primary btn-block enter-btn">Login</button>
  </div>

  <p class="sign-up">Don't have an Account?<a href="{{ route('register') }}"> Sign Up</a></p>
</form>
Now paste this below code to your registration form.
resourses/views/register.blade.php
<form method="post" action="{{ route('register') }}">
  @csrf
<div class="form-group">
  <label>Username</label>
  <input type="text" name="name" class="form-control p_input">
</div>
<div class="form-group">
  <label>Email</label>
  <input type="email" name="email" class="form-control p_input">
</div>
<div class="form-group">
  <label>Password</label>
  <input type="password" name="password" class="form-control p_input">
</div>

<div class="text-center">
  <button type="submit" class="btn btn-primary btn-block enter-btn">Register</button>
</div>

<p class="sign-up text-center">Already have an Account?<a href="{{ route('login') }}"> Sign In</a></p>
<p class="terms">By creating an account you are accepting our<a href="#"> Terms & Conditions</a></p>
</form>
Now all are ok. If you want to redirect the user to a custom path after login then you have to do just one thing. Visit the following path and change the path.
app/Providers/RouteServiceProvider.php
<?php

namespace App\Providers;

use Illuminate\Cache\RateLimiting\Limit;
use Illuminate\Foundation\Support\Providers\RouteServiceProvider as ServiceProvider;
use Illuminate\Http\Request;
use Illuminate\Support\Facades\RateLimiter;
use Illuminate\Support\Facades\Route;

class RouteServiceProvider extends ServiceProvider
{

    public const HOME = '/home'; //public const HOME = '/give_your_required_path_here';

    public function boot()
    {
        $this->configureRateLimiting();

        $this->routes(function () {
            Route::middleware('api')
                ->prefix('api')
                ->group(base_path('routes/api.php'));

            Route::middleware('web')
                ->group(base_path('routes/web.php'));
        });
    }

    protected function configureRateLimiting()
    {
        RateLimiter::for('api', function (Request $request) {
            return Limit::perMinute(60)->by($request->user()?->id ?: $request->ip());
        });
    }
}
Read also: Laravel Passwordless Login | Login With Username In Laravel
Conclusion
Now we know laravel 9 login registration. After completing this tutorial, hope you will be able to create your own custom login and registration system in your laravel 9 application.