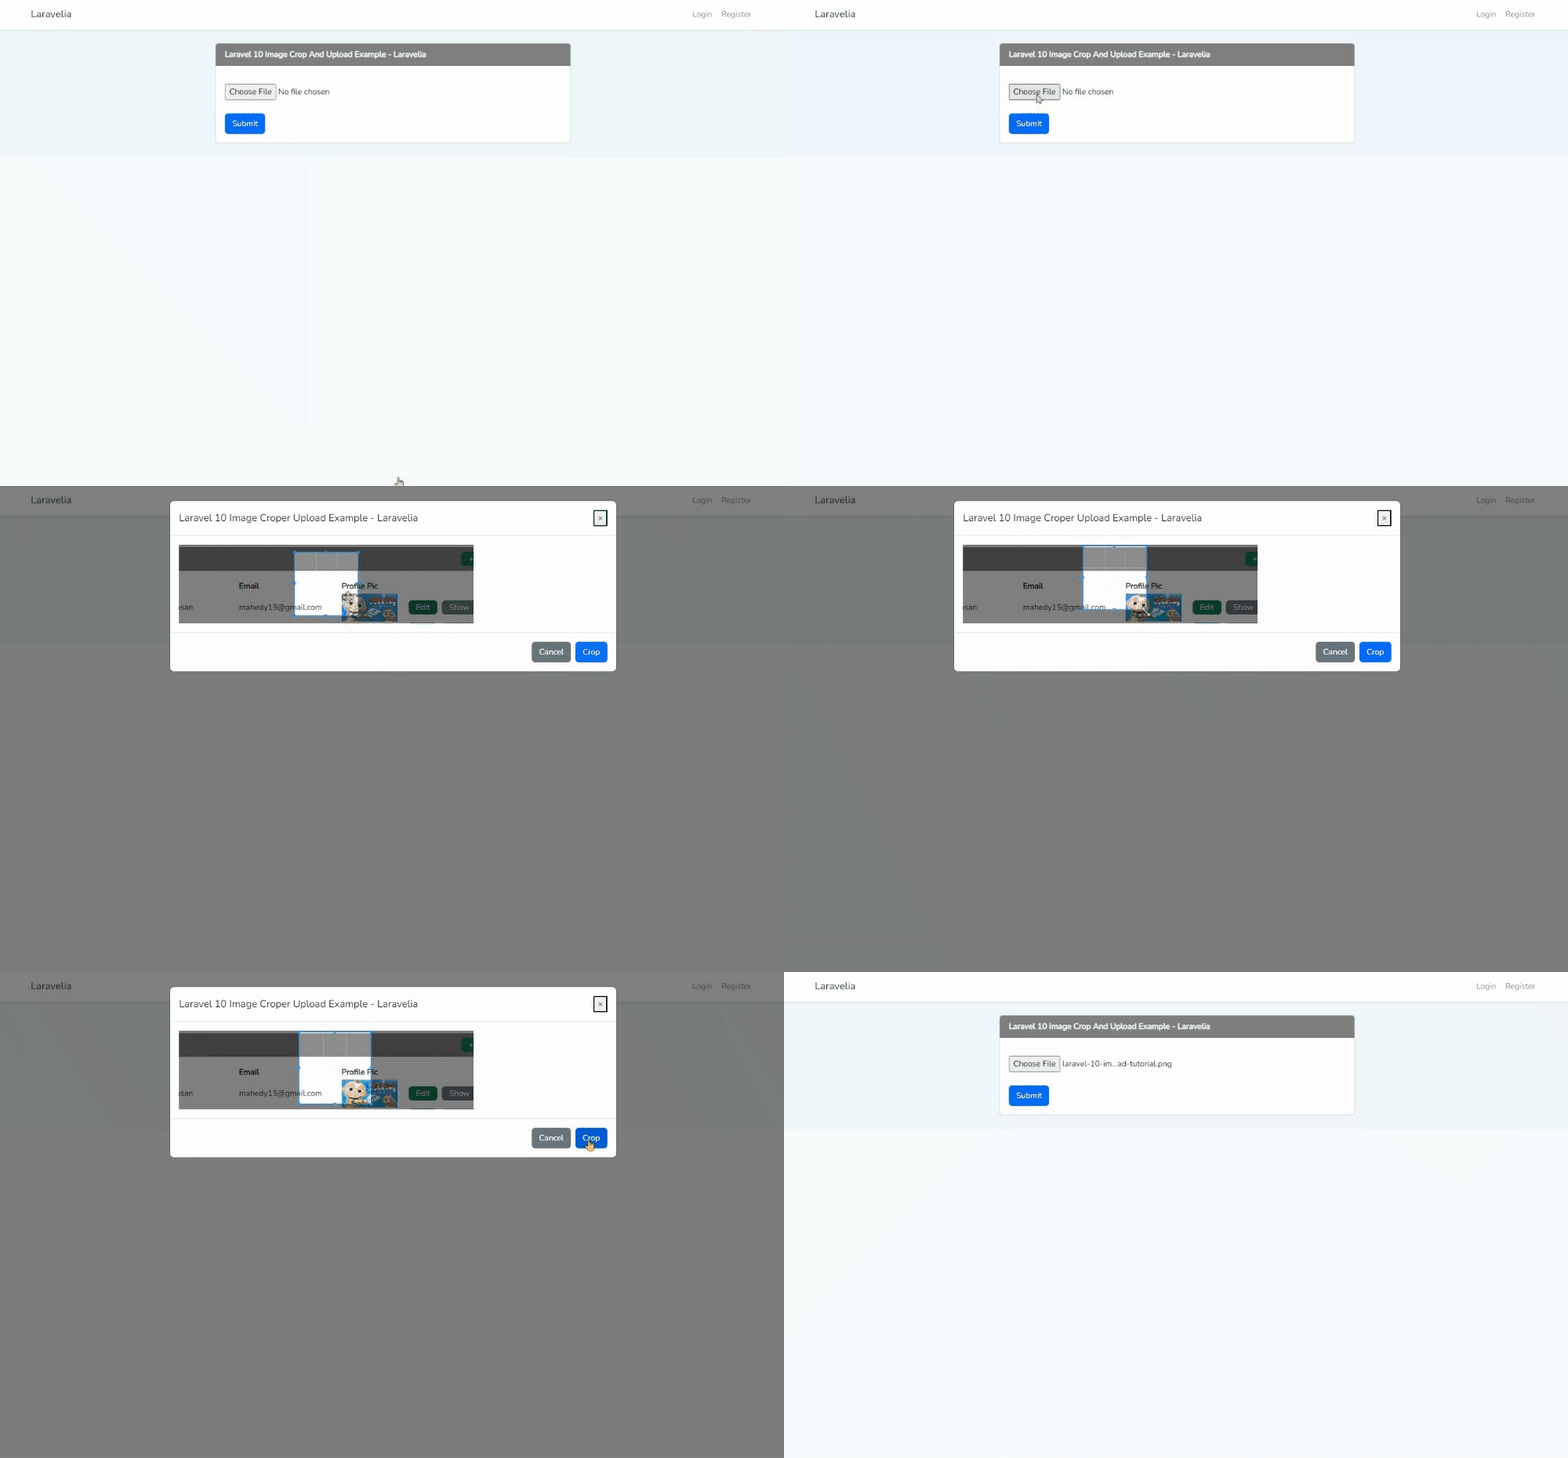
If you want to upload an image in laravel application after cropping then there is a beautiful library called cropper js. Using cropper js, we can crop image before uploading in laravel application. In this tutorial, I will show you how to crop an image before uploading it in laravel with the cropper js plugin.
I will create an Image model and I will save that cropped image to this table using the ajax request. When a user clicks on the choose file button, then we will open a modal with that selected image. Then the user will crop the image to his expected ratio. I will use the latest laravel 10 version though this code will work for all laravel versions from laravel 5 to laravel 10.
You know that cropper js is a nice and very lightweight javascript library for cropping images. From this tutorial, you will learn how to deal with cropper js perfectly from this tutorial. Cropper js convert the image to base64 and we will convert it as an image from the controller and then save this converted image.
You can see the preview of this laravel 10 crop image before upload tutorial below:

Step 1: Download Fresh Laravel
In this first step, we need a fresh Laravel 10 application for the laravel 10 crop image before upload. So download it by the below command:
composer create-project laravel/laravel example-app
Step 2: Create Model
We are going to use the Image model. Now create an image model and update it like below:
database/migrations
<?php

use Illuminate\Database\Migrations\Migration;
use Illuminate\Database\Schema\Blueprint;
use Illuminate\Support\Facades\Schema;

return new class extends Migration
{
    /**
     * Run the migrations.
     *
     * @return void
     */
    public function up()
    {
        Schema::create('images', function (Blueprint $table) {
            $table->id();
            $table->string('name');
            $table->timestamps();
        });
    }

    /**
     * Reverse the migrations.
     *
     * @return void
     */
    public function down()
    {
        Schema::dropIfExists('images');
    }
};
And now update the model like:
app/Models/Image.php
<?php

namespace App\Models;

use Illuminate\Database\Eloquent\Factories\HasFactory;
use Illuminate\Database\Eloquent\Model;

class Image extends Model
{
    use HasFactory;

    protected $fillable = [
        'name'
    ];
}
Step 3: Connect database
After successfully installing the laravel app and then configuring the database setup. We will open the ".env" file and change the database name, username, and password in the env file to create how to crop and upload image in laravel 10.
.env
DB_CONNECTION=mysql
DB_HOST=127.0.0.1
DB_PORT=3306
DB_DATABASE=Enter_Your_Database_Name
DB_USERNAME=Enter_Your_Database_Username
DB_PASSWORD=Enter_Your_Database_Password
Now run php artisan migrate command to update the database.
php artisan migrate
Read also: Laravel 10 Multiple Image Upload With Dropzone Js
Step 4: Create Route
Now in this step, we have to create a route to upload images using cropper js with laravel.
routes/web.php
<?php

use Illuminate\Support\Facades\Route;
use App\Http\Controllers\TutorialController;

Route::get('/', [TutorialController::class,'index'])->name('welcome');
Route::post('/', [TutorialController::class,'store'])->name('store');
Step 5: Create Controller
Now in this step, we have to create a TutorialController to define this method to create how to crop an image in laravel and save it into the database.
php artisan make:controller TutorialController
Now update the controller like the below:
app/Http/Controllers/TutorialController.php
<?php

namespace App\Http\Controllers;

use App\Models\Image;
use Illuminate\Http\Request;

class TutorialController extends Controller
{
    public function index()
    {
        return view('welcome');
    }

    public function store(Request $request)
    {
        $path = public_path('upload/');
        !is_dir($path) &&
            mkdir($path, 0777, true);

        $image_parts      = explode(";base64,", $request->image);
        $image_type_aux   = explode("image/", $image_parts[0]);
        $image_type       = $image_type_aux[1];
        $image_base64     = base64_decode($image_parts[1]);
        $image_name       = uniqid() . '.png';
        $image_full_path  = $path . $image_name;
        file_put_contents($image_full_path, $image_base64);

        $saveFile       = new Image();
        $saveFile->name = $image_name;
        $saveFile->save();

        return response()->json([
            'success' => 'Image Uploaded Successfully
        ]);
    }
}
Step 6: Create Views
In this step, we will create a form for copper js for cropping images before uploads. So update the welcome file like below:
@extends('layouts.app')

@push('style')
<link rel="stylesheet" href="https://cdnjs.cloudflare.com/ajax/libs/cropperjs/1.5.6/cropper.css"/>
@endpush

@section('content')
<div class="container">
    <div class="row justify-content-center">
        <div class="col-md-6">
            <div class="card">
                <div class="card-header" style="background: gray; color:#f1f7fa; font-weight:bold;">
                  Laravel 10 Image Crop And Upload Example - Laravelia
                </div>
                 <div class="card-body">
                    <form action="{{ route('store') }}" method="post" enctype="multipart/form-data">
                      @csrf
                        <div class="form-group mt-3">
                            <input type="file" name="image" class="image">
                        </div>
                        <button type="submit" class="btn btn-primary mt-4">Submit</button>
                    </form>
                </div>
            </div>
        </div>
    </div>
</div>

<div class="modal fade" id="modal" tabindex="-1" role="dialog" aria-labelledby="modalLabel" aria-hidden="true">
  <div class="modal-dialog modal-lg" role="document">
    <div class="modal-content">
      <div class="modal-header">
        <h5 class="modal-title" id="modalLabel">Laravel 10 Image Croper Upload Example - Laravelia </h5>
        <button type="button" class="close" data-dismiss="modal" aria-label="Close">
          <span aria-hidden="true">×</span>
        </button>
      </div>
      <div class="modal-body">
        <div class="img-container">
            <div class="row">
                <div class="col-md-8">
                    <img id="image" src="https://avatars0.githubusercontent.com/u/3456749">
                </div>
                <div class="col-md-4">
                    <div class="preview"></div>
                </div>
            </div>
        </div>
      </div>
      <div class="modal-footer">
        <button type="button" class="btn btn-secondary" data-dismiss="modal">Cancel</button>
        <button type="button" class="btn btn-primary" id="crop">Crop</button>
      </div>
    </div>
  </div>
</div>

@endsection
@push('script')
<script src="https://ajax.googleapis.com/ajax/libs/jquery/3.6.3/jquery.min.js"></script>
<script src="https://cdnjs.cloudflare.com/ajax/libs/cropperjs/1.5.6/cropper.js"></script>
<script>
var $modal = $('#modal');
var image = document.getElementById('image');
var cropper;

$("body").on("change", ".image", function(e){
    var files = e.target.files;
    var done = function (url) {
      image.src = url;
      $modal.modal('show');
    };
    var reader;
    var file;
    var url;
    if (files && files.length > 0) {
      file = files[0];
      if (URL) {
        done(URL.createObjectURL(file));
      } else if (FileReader) {
        reader = new FileReader();
        reader.onload = function (e) {
          done(reader.result);
        };
        reader.readAsDataURL(file);
      }
    }
});
$modal.on('shown.bs.modal', function () {
    cropper = new Cropper(image, {
      aspectRatio: 1,
      viewMode: 3,
      preview: '.preview'
    });
}).on('hidden.bs.modal', function () {
   cropper.destroy();
   cropper = null;
});
$("#crop").click(function(){
    canvas = cropper.getCroppedCanvas({
        width: 160,
        height: 160,
      });
    canvas.toBlob(function(blob) {
        url = URL.createObjectURL(blob);
        var reader = new FileReader();
         reader.readAsDataURL(blob);
         reader.onloadend = function() {
            var base64data = reader.result;
            $.ajax({
                type: "POST",
                dataType: "json",
                url: "{{ route('store') }}",
                headers: {
                    'X-CSRF-TOKEN': $('meta[name="csrf-token"]').attr('content')
                },
                data: {'_token': $('meta[name="_token"]').attr('content'), 'image': base64data},
                success: function(data){
                  $modal.modal('hide');
                  alert("Image successfully uploaded");
                }
              });
         }
    });
})
</script>
@endpush
Now all are set to go. Now run php artisan serve the command to start the development server and test the cropper js with laravel. Hope it will work successfully.
Read also: Laravel 10 Image Upload And Display Tutorial
Conclusion
I have tried my best to create this laravel 10 crop image before upload tutorial. Now we know which is the best package for laravel image crop package. Hope this laravel crop image before upload tutorial will help you to create how to crop and upload image in laravel 10.
