
If you insert data using Ajax request in Laravel, then you know that the end user will get a good user experience. Cause you know that, when we use Ajax requests then without page refresh we can send a request to the server and get a response as well. So end user can do their task without page refresh. So if you want to save data from the client side, then it is good practice to use Ajax request.
In this tutorial, I will show you how to insert data in Laravel 10 application using jQuery Ajax request. I will create a simple HTML form to save employee data into a database using Ajax request. So if you don't know how to save data using Ajax request then this how to insert data through Ajax in laravel tutorial is for you.
So let's see the example guide of insert data using ajax in laravel 10.
Step 1: Download Fresh Laravel
In the first step of laravel 10 ajax insert data example, download a fresh Laravel application by the following command:
composer create-project laravel/laravel example-app
Step 2: Create Migration
In this step, we need to create a migration and model for generating a employees table. So run the below command to create employees a table cause we will save data into the employee table using Ajax request.
php artisan make:model Employee -m
Now update the migration like below:
database/migrations
<?php

use Illuminate\Database\Migrations\Migration;
use Illuminate\Database\Schema\Blueprint;
use Illuminate\Support\Facades\Schema;

return new class extends Migration
{
    /**
     * Run the migrations.
     */
    public function up(): void
    {
        Schema::create('employees', function (Blueprint $table) {
            $table->id();
            $table->string('name');
            $table->string('email')->unique();
            $table->date('joining_date')->nullable();
            $table->integer('joining_salary');
            $table->timestamps();
        });
    }

    /**
     * Reverse the migrations.
     */
    public function down(): void
    {
        Schema::dropIfExists('employees');
    }
};
And now update the model like along with protected property guard to avoid mass assignment error:
app/Models/Employee.php
<?php

namespace App\Models;

use Illuminate\Database\Eloquent\Factories\HasFactory;
use Illuminate\Database\Eloquent\Model;

class Employee extends Model
{
    use HasFactory;

    protected $guarded = [];
}
Step 3: Connect database
In this step, we will connect the database, and I am going to use MySQL. So connect it like the below by updating the .env file:
.env
DB_CONNECTION=mysql
DB_HOST=127.0.0.1
DB_PORT=3306
DB_DATABASE=tutorial
DB_USERNAME=root
DB_PASSWORD=
Now run the migration command:
php artisan migrate
Step 4: Create Route
Now in this step, create route like the one below to complete the laravel 10 ajax insert data example. I am going to use an AjaxController. So save the data using ajax request:
routes/web.php
use Illuminate\Support\Facades\Route;
use App\Http\Controllers\AjaxController;

Route::controller(AjaxController::class)->group(function () {
    Route::get('todo', 'index');
    Route::post('todo', 'store')->name('store');
});
Read also: Laravel CSRF Token Mismatch For Ajax POST Request (Solved)
Step 5: Create Controller
Now we have to create AjaxController to complete our laravel ajax insert data. So run the below command to create a controller:
php artisan make:controller AjaxController
Now update this controller like this:
app/Http/Controllers/AjaxController.php
<?php

namespace App\Http\Controllers;

use App\Models\Employee;
use Illuminate\Http\Request;

class AjaxController extends Controller
{
    public function index()
    {
        return view('todo.index');
    }

    public function store(Request $request)
    {
        Employee::create($request->all());

        return response(['success' => 'Employee created successfully.']);
    }
}
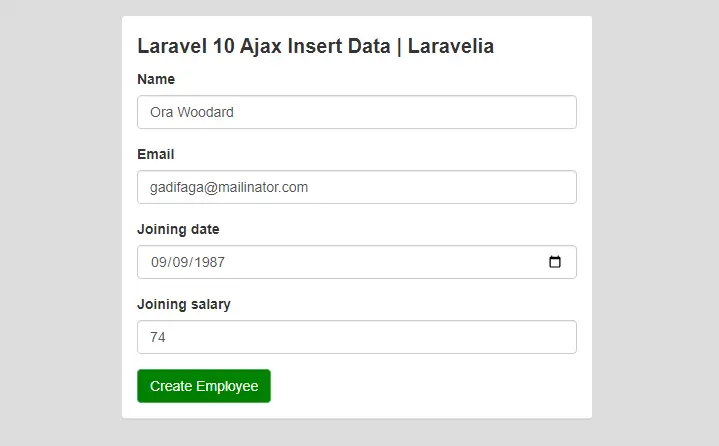
Step 6: Create Views
In this final step, we have to create an HTML form. So create it in the following path and update it like this:
resources/view/todo/index.blade.php
@extends('layouts.app')

@section('content')
    <div class="panel panel-default">
        <div class="panel-body">
            <p style="font-size:20px; font-weight:bold;">Laravel 10 Ajax POST Request Example | Laravelia</p>
            <form class="mt-3" id="form-data">
                <div class="form-group">
                    <label for="name">Name</label>
                    <input type="text" name="name" id="name" class="form-control">
                </div>
                <div class="form-group">
                    <label for="email">Email</label>
                    <input type="text" name="email" id="email" class="form-control">
                </div>
                <div class="form-group">
                    <label for="joining_date">Joining date</label>
                    <input type="date" name="joining_date" id="joining_date" class="form-control">
                </div>
                <div class="form-group">
                    <label for="joining_salary">Joining salary</label>
                    <input type="number" name="joining_salary" id="joining_salary" class="form-control">
                </div>
                <button type="button" class="btn btn-success submit-form" style="background:green" id="create_new">Create Employee</button>
            </form>
        </div>
    </div>
@endsection

@push('js')
<script src = "https://ajax.googleapis.com/ajax/libs/jquery/2.1.3/jquery.min.js"></script>
<script type="text/javascript">

    $(".submit-form").click(function(e){
        e.preventDefault();
        var data = $('#form-data').serialize();
        $.ajax({
            type: 'post',
            url: "{{ route('store') }}",
            data: data,
            headers: {
                'X-CSRF-TOKEN': $('meta[name="csrf-token"]').attr('content')
            },
            beforeSend: function(){
                $('#create_new').html('....Please wait');
            },
            success: function(response){
                alert(response.success);
            },
            complete: function(response){
                $('#create_new').html('Create New');
            }
        });
	});
</script>
@endpush
Now if you start your server by running php artisan serve and send an Ajax request to submit this form, you will see that it's working fine.
Read also: Laravel 10 Ajax POST Request Example
Conclusion
After completing this how to send data via ajax in laravel tutorial, hope now you can create this laravel 10 ajax post request example in laravel 10 application. Hope this how to post a ajax request in laravel tutorial will help you