
We can normally send mail using queue in laravel 10 without using or without creating any jobs. But in this example, we will send mail in Laravel 10 using queue by creating our own custom jobs. From that, we will process our laravel 10 queue mail.
You know that there is an artisan command like queue:work or queue:listen to process our queue in the background. So in this tutorial, we will create an email template then we will create a queue job then we will dispatch that queue job to complete our queue tutorial example.
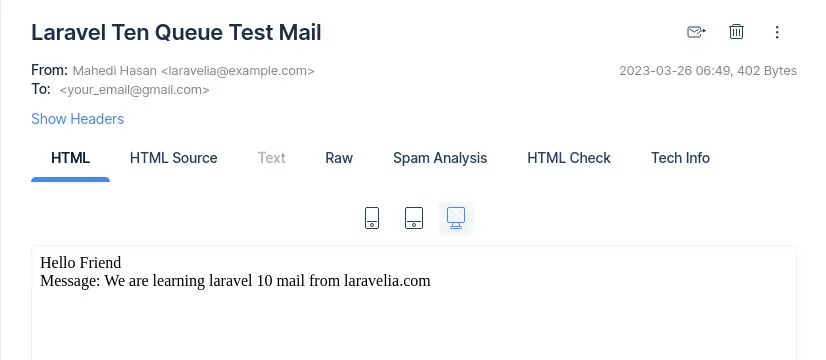
So from this laravel 10 queue tutorial, you will learn how to run queue job in laravel 10 and How to use queues in Laravel 10. So let's see the demo queue mail example inbox from below before starting this laravel 10 queue tutorial:
Step 1: Install Laravel 10
If you do not have the fresh Laravel 10 app, then you may go ahead and execute the below command:
composer create-project laravel/laravel example-app
Step 2: Make Configuration
In the first step, before sending mail using Laravel 10 queue, we need to configure mail like mail host, mail port, mail username, and mail password so Laravel 10 will use that sender configuration for sending an email.
.env
MAIL_MAILER=smtp
MAIL_HOST=sandbox.smtp.mailtrap.io
MAIL_PORT=2525
MAIL_USERNAME=bcca41cf7e855f
MAIL_PASSWORD=c1abf4f6f9596d
MAIL_ENCRYPTION=tls
MAIL_FROM_ADDRESS="laravelia@tutorial.com"
MAIL_FROM_NAME="${APP_NAME}"
Read also: Laravel 10 Markdown Mail Options With Send Example
Step 3: Create Mail
Laravel provides an artisan command to create mail. So run make:mail command to create a mail class. Run the below command to create a mail like this.
php artisan make:mail LaravelTenTestMail
Now you will have a new folder "Mail" in-app directory with a LaravelTenTestMail.php file. So let's simply copy the below code and paste it on that file.
app/Mail/LaravelTenTestMail.php
<?php

namespace App\Mail;

use Illuminate\Bus\Queueable;
use Illuminate\Contracts\Queue\ShouldQueue;
use Illuminate\Mail\Mailable;
use Illuminate\Mail\Mailables\Content;
use Illuminate\Mail\Mailables\Envelope;
use Illuminate\Queue\SerializesModels;
use Illuminate\Mail\Mailables\Address;

class LaravelTenTestMail extends Mailable
{
    use Queueable, SerializesModels;

    public $data;

    /**
     * Create a new message instance.
     */
    public function __construct($data)
    {
        $this->data = $data;
    }

    /**
     * Get the message envelope.
     */
    public function envelope(): Envelope
    {
        return new Envelope(
            from: new Address('laravelia@example.com', 'Mahedi Hasan'),
            subject: 'Laravel Ten Queue Test Mail',
        );
    }

    /**
     * Get the message content definition.
     */
    public function content(): Content
    {
        return new Content(
            view: 'email.test',
            with: [
                'data' => $this->data
            ]
        );
    }

    /**
     * Get the attachments for the message.
     *
     * @return array<int, \Illuminate\Mail\Mailables\Attachment>
     */
    // public function attachments(): array
    // {
    //     return [];
    // }
}
Now create a test email template in the following directory like:
resources/views/email/test.blade.php
Hello Friend <br>

<div>
    Message: {{ $data['text'] }}
</div>
Step 4: Configure Queue
Now in the next step, we will make a configuration on the queue driver so first of all, we will set the queue driver as "database". Update .env like:
.env
QUEUE_CONNECTION=database
After that, we need to generate a migration for creating a jobs table. So run the command for queue database tables:
php artisan queue:table

//then

php artisan migrate
Step 5: Create Job
There is also an artisan command to create a queue job. So run the below command and create:
php artisan make:job LaravelQueueMailJob
Now you have the LaravelQueueMailJob.php file in the Jobs directory. So let's see that file and put the below code on that file.
app/Jobs/LaravelQueueMailJob.php
<?php

namespace App\Jobs;

use Illuminate\Bus\Queueable;
use App\Mail\LaravelTenTestMail;
use Illuminate\Support\Facades\Mail;
use Illuminate\Queue\SerializesModels;
use Illuminate\Queue\InteractsWithQueue;
use Illuminate\Contracts\Queue\ShouldQueue;
use Illuminate\Foundation\Bus\Dispatchable;
use Illuminate\Contracts\Queue\ShouldBeUnique;

class LaravelQueueMailJob implements ShouldQueue
{
    use Dispatchable, InteractsWithQueue, Queueable, SerializesModels;

    public $data;

    /**
     * Create a new message instance.
     */
    public function __construct($data)
    {
        $this->data = $data;
    }

    /**
     * Execute the job.
     */
    public function handle(): void
    {
        Mail::to($this->data['email'])
            ->send(new LaravelTenTestMail($this->data));
    }
}
Step 6: Add route
Now time to test the queue job, so let's simply create a route with the following path.
routes/web.php
<?php

use Illuminate\Support\Facades\Route;
use Illuminate\Support\Facades\Mail;


Route::get('laravel_ten_queue_test_mail', function () {
    $data['text'] = "We are learning laravel 10 mail from laravelia.com";
    $data['email'] = 'your_email@gmail.com';
    dispatch(new App\Jobs\LaravelQueueMailJob($data));

    dd('Mail send successfully.');
});
Now run the command php artisan serve and visit the below URL and check it:
URL
Now run the below command and you will see the processed job in your queue terminal like that:
mahedi@debian:/var/www/html/laravelia-tutorial$ php artisan queue:listen

   INFO  Processing jobs from the [default] queue.

  2023-03-26 06:49:07 App\Jobs\LaravelQueueMailJob ................... RUNNING
  2023-03-26 06:49:11 App\Jobs\LaravelQueueMailJob ........... 4,601.16ms DONE
Read also: Central Place Of Laravel | Service Provider Explanation
Conclusion
Now we know how to use queues in Laravel 10. Now we also see laravel 10 job queue example. Hope this how to run queue job in laravel tutorial will help you. Hope this laravel 10 mail queue example tutorial will help you.